 We are a little soap crazy here and always seem to be sampling a number of exotic bars in the bath.
Soap making has been a passion of mine for about 25 years now, since I first learned it was actually something I could make myself at home. My father-in-law was telling us over dinner one night that he’d made a batch of soap with one of his elementary school classes for a science project; I was positively captivated. He agreed to show me how, and I’ve been making it for myself and special batches for friends ever since.
Homemade Shampoo Bar
I’ve made many kinds of soap, all wonderful in their own way, but my favorite recipe is for a simple homemade shampoo bar. Yes, shampoo. I first became intrigued with this kind of soap when I saw a bar of the stuff at a local grocery store. What a concept: small, compact, no plastic bottle, lightweight, biodegradable–and no need for conditioner as the natural oils in our hair and scalp are not stripped away with its use. (First, the big businesses sell us a product that strips our hair of the good oils, then sell us something else to simulate what their first product has taken out. That, I suspect, is how empires are built.)
I tried the fragrant herbal bar and was completely convinced of the value of such a product. The only problem, for me, was the cost; I simply could not afford to buy this wonderful little bar on a regular basis. After doing a bit of research, however, I found a recipe that was nearly-identical to the product I had fallen in love with, in an old book by Ann Bramson, called Soap: Making It Enjoying It.
Recipe for Natural Shampoo Bars
Here’s the recipe for shampoo bars:
- 24 oz. coconut oil
- 38 oz. olive oil
- 24 oz. castor oil
- 12 oz. sodium hydroxide (lye)
- 32 oz. spring water
Simply follow the directions for making a basic batch of soap, using this recipe. Ann’s book is a fine primer, but she uses animal fat in many of her soaps, which I have not used for many years. I had used lard and suet in the very beginning–which may be more traditional since it was what people had at hand (and it generally makes a harder soap)–but I have found that these fats easily become rancid which makes the soap, as far as I’m concerned, completely unusable.
Add Essential Oils (NOT Scented) for Fragrance
In addition, I add to this recipe a blend of the following essential (not scented!) oils to impart fragrance (about 1½ to 2 oz. for the above recipe): lavender, rosemary, and cedarwood. These are the oils listed on that wonderful-but-pricey shampoo bar that first got my attention, but they also contribute various qualities that I want in my shampoo bar. Rosemary, for example, has antiseptic & antibacterial properties, as does lavender, which is also antifungal. Cedarwood and rosemary are also good tonics for your hair & scalp. These are just a few of their properties.
To learn more, get yourself a good aromatherapy chart, at your local health food store or any place where essential oils are sold. There are certainly a few exotic & costly recipes out there for shampoo bars, but having made and used both kinds, I could honestly not tell any difference between the two bars; they both worked equally well. Consider learning from one who spent more than she needed to: try the basic recipe first and see how it works for you.
I get most of my soap making ingredients at a wonderful place called Glory Bee Foods, in Eugene, Oregon. I used to shop there in person when I lived near Eugene, but now I have to do mail order. They have a terrific selection of just about anything you could need for soap making (including aromatherapy charts), and the staff is very friendly, knowledgeable, and helpful.
Soap Molds
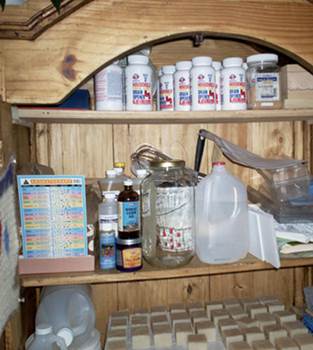
I finally got all my soap making stuff in one closet. You can see my latest batch curing on the bottom shelf.
I have experimented with a number of soap molds over years, but all I use now is a basic wooden break-away box. It looks like a small wooden drawer, but one side is hinged, allowing the user to slide the enormous bar out, rather than having to try to lift it out, which becomes a real problem when the soap is simply not hard enough to lift out easily, but still needs to be cut into bars for curing. My next mold will be a long, narrow, break-away mold that simply needs to be sliced into bars. These can be kind of pricey; alternatively, you may decide to check them out online to get the dimensions, and make your own.
An ideal liner for your wooden break-away soap mold, I have found, is freezer paper. It is thick and sturdy enough, and will protect your soap box for a lifetime. I just measure the inside dimensions of the box, then cut the paper to fit, shiny side up. You can neatly fold the paper at the corners, then tape them securely and completely with heavy plastic packing tape to lie flat, or actually cut out the shape of the break-away box, then tape the corners securely.
I have never used the cute plastic molds that come in various shapes for homemade soap and I wouldn’t recommend their use, except for melt & pour soaps, for which they are ideal. Ordinarily, homemade soap must be cut into bars within 1-3 days, and the texture of home made soap, at that point, won’t easily come away from a surface; it can be tricky enough just to slice the stuff.
Using Your Shampoo Bar
Using a shampoo bar for the first time may feel a bit disconcerting; your hair will simply not have that reassuring, slimy sensation that we have become so accustomed to, being raised on commercial products. The first time I used a shampoo bar, I got this “Oh-no-maybe-I-should-use-the-regular-shampoo-and-conditioner-just-in-case!” sensation; I remember thinking that my hair felt like wet straw. Fear not.
For best results, you may need to get into new habits, particularly if you have long hair. First, if you’re not already in the habit, brush your hair before washing. If your hair is long, start brushing a few inches from the bottom, then go back and begin brushing a few inches higher, and so on. Next, get your shampoo bar wet and use plenty of water when working up a lather. Rinse.
For a natural and economical de-tangler, simply use cider vinegar (nothing fancy or expensive; the cheap stuff is perfect): one tablespoon to a cup of water. Pour through your hair, then rinse again. I like to let my hair dry completely before combing for best results, but do whatever works best for you. And no, you won’t smell like a salad (been asked that more than a few times!).
Taking Care of Homemade Bath Products
Finally, you want to take special care in keeping your shampoo bar high and dry between uses, like all homemade bath products. I like to put a few polished stones in a fancy dish or abalone shell for this use. It’s simple, pretty, and a great use for those odd bowls or saucers that you love but couldn’t find a use for. Polished stones that come in those little mesh bags seem to be in every crafts store now, and in different colors and sizes. If you live in North America, you may now find them even at the ‘dollar’ or ’99 cents’ stores.
Soap making—especially shampoo bars–has been an enormous source of satisfaction and pleasure for me over the years, particularly for its simplicity and value. I hope it will be an enduring source of enjoyment for you as well.
Whisperingsage says
Wonderful!
Now I use raw eggs and a little of Dr. Bronner’s castile soap, which makes it very foamy. But he’s a bit expensive. I tried just the eggs and honey and warm water and borax this morning and my hair is very nice now. Just hoping to find some foamy foods to add. The eggs look foamy but don’t really make suds for cleaning.
Another good thing about these homemade toiletries is it frees us from toxic chemicals that go through our skin and there are a lot of them in shampoos. I also find that I only have to wash my hair twice a week now as I found on the Poo free site that shampoos are loaded with silicone, which is what the slippery feeling is. And it forces you to have to wash your hair every day because you think it’s greasy. Well, it’s silicone! And that is how they make money.
Amy@homemade bath products says
These would be great for my husband. He insists on washing his hair with soap. I didn’t know that about cedarwood, lavendar, and rosemary. Great information!
Loyce Henderson says
Hello, I have been making soap for years, but want to try making henna shampoo bars as I use henna to dye my hair.
I am not sure when or how to add the henn to the soap mixture. Would it be better to add the powder directly to the mixture or make a tea from the henna along with some other herbs and then add to the mixture after the lye water?
When making goats milk soap, I dissolve the lye in a small amount of water and then put the remaining liquid (goats milk) in the freezer to get slushy. After I add the lye water to the oils I then add the slushy goats milk to make up the remaining liquid. It always produces a wonderful goats milk soap. I would assume adding the (tea) would be the same.
Any suggestions would be appreciated.
Loyce
Isaac says
Are the shampoo bars residue free
jeannie says
hi..is this recipe for a hot or cold process?
josie says
thank you! I’ve been looking for this recipe!!! I read the ingredients on the bar shampoo I currently use (which the maker says is from an old recipe found tucked in a book). Anyhow, all the other recipes I found have way more ingredients. THIS is the one I’ve been searching for. Thanks!!
Admin says
You’re welcome, Josie!
josie says
Ooops, one question. Are you showing liquid measurements for the ounces or weight? The soap making 101 site I found weighs her liquids.
jean says
I like the looks of this recipe. Should be really good! One question though have you ever tried this recipe with potassium hydroxide instead of sodium hydroxide? I am ready to try my first batch of liquid shampoo and wonder if you can’t just change the lye in the shampoo bars recipe? Anyone know?