We’ve read about probiotics. They’re good for us, they help us digest, and they can even be beneficial in healing illnesses (like urinary tract infections) and restoring the body’s natural systems after a course of antibiotics. One of the best ways to get your probiotics is simply by eating some yogurt.
Making your own yogurt is a healthy, cheap way to incorporate probiotics into your diet. It’s easier than you think, and actually making something in your own kitchen gives you that great feeling of satisfaction right from the very first bite. And when you make your own yogurt, you absolutely know it’s fresh, which is a wonderful bonus – in fact, it’s been proven that the fresher the yogurt, the more “good bacteria” it contains.
Equipment Needed to Make Yogurt at Home
Although some web sites and articles point to yogurt makers, there’s really no need for any special equipment. Essentially, you only need three things equipment-wise: a large-ish pot, a food thermometer, and a container to hold the yogurt. For the container, I use a quart canister from old store bought yogurt (this has an added environmental bonus, because many recycling centers don’t take yogurt containers).
Ingredients to Make Yogurt
To make yogurt, you will need only two ingredients. The first one (and the most important!) is a yogurt culture. You can buy these at the health food store, but you can also use one to two tablespoons of leftover plain yogurt, which is generally what I do. Then, every time you run out of yogurt, just save this small amount — you can even freeze it, and this way you’ll always have an active yogurt starter with good bacteria in it.
The second ingredient is the milk of your choice. I use regular organic milk, but you can also use goat milk as well as many nondairy alternatives including soy, almond, coconut, or rice milk. Just make sure that if you use a culture from a yogurt sample, you’re using the appropriate kind of yogurt. If you’re using soy milk or another kind of milk that contains no lactose, it may be helpful to stir in a spoonful of sugar to encourage the fermentation process.
Making of Yogurt
Now that you have your equipment and ingredients ready, here is how to proceed:
Step 1: Slowly heat the milk on low heat. When it reaches a boil, turn it down and let cool. This heating process is important because it kills any existing bacteria in the milk that would “fight” the good bacteria, and gives the yogurt culture a clean slate to start with.
Step 2: When the temperature is down to 110, stir in the culture. Measure to make sure that it’s no hotter than 110; you do not want to kill your culture.
Step 3: Leave the yogurt alone in a dark and somewhat warm environment. I wrap my quart jar in a hand towel and put it in the oven where it can ferment undisturbed; heating the oven for a minute beforehand and then turning it off gives it a nice warmth that encourages the fermentation process. If your oven has a pilot light, that may be enough. Some people also wrap their yogurt and put it above the fridge, or into a cooler that contains a hot water bottle. Any of these methods work. Leave overnight, or for at least six hours (the longer you let it ferment, the more tart the yogurt will taste).
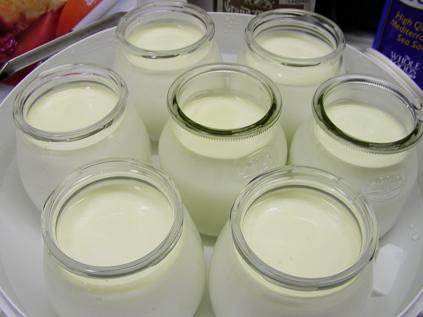
Step 4: Enjoy! Some tasty stir-ins include raw honey, maple syrup, and fresh fruit.
What Kind of Milk to Use
Lastly, I want to say this: many people choose to use cow’s milk, which I know has been the source of some Skrewtips controversy lately, and I wanted to point out that adding live cultures and fermenting makes milk much easier to digest for humans. Ordinarily, it’s true that cow’s milk passes through the human system almost undigested — we only absorb 30% of the nutrients in it. However, when it’s been made into yogurt, we can consume a very small amount and still retain almost all of the calcium and other nutrients with the added bonus of the digestive probiotics.
Enjoy the Nutrient Content of Dairy
Yogurt is a healthful way to enjoy the nutrient content of dairy even for people who are lactose intolerant. And if you absolutely can’t stand the idea, then try making yogurt with the milk of your choice — experiment ’til you find one that works for you. Homemade yogurt is a fun way to get personal and interact with your food, which is something that many of us have forgotten about … and it’s something that provides a great health benefit, too.
(Photo credit: Iz from Yummylicious)
 Maria (Niina) Pollari is a poet, editor, writer and translator. She wrote two chapbooks, Fabulous Essential (2009) and Book Four (2011). Pollari’s writing has been featured in numerous literary journals as well as the Brooklyn Rail and Jezebel.com. She has received her Master’s in Creative Writing from Sarah Lawrence College.
Storm Supplements says
I have never thought of making my own yogurt, the process seems to simple! Natural yogurt is great for helping digestion, especially after large meals, so making it myself seems like such a great idea!
-Dan
Louise says
I use to make my own yogurt. Now I make kefir from real kefir grains. It has many more bacteria and healthy yeast. It is much easier to culture because it doesn’t need heat like yogurt. You can even let it culture just sitting in the fridge.
I also think it is an excellent way to try to restore pasteurized milk to have the original enzymes losst in heating it.